Purpose
Steps
 Watch video - Side Supported Shear Panels
To add shear panels:
1. In the Span box, enter the truss span.
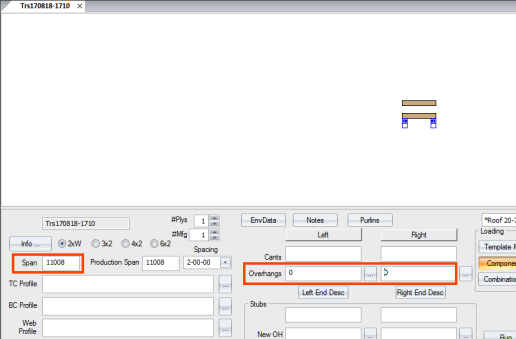
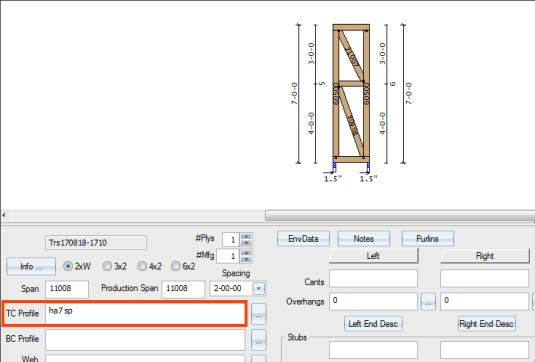
2. In the TC Profile box, enter the Shear Panel (sp) command. For this example, ha7 sp is used.
The length of the vertical panel created is defined in the Env Data settings. See Geometry Controls Settings > Shear Panel vertical panel length.
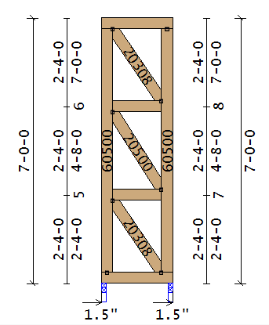
3. In the TC Profile box, enter 3 at the end of the TC Profile command line. You can override the default vertical length by entering the number of panels after the sp command.

Truss Studio divides the height of the truss into the number of equal segments you specified. An example is shown below.
To add blocks:
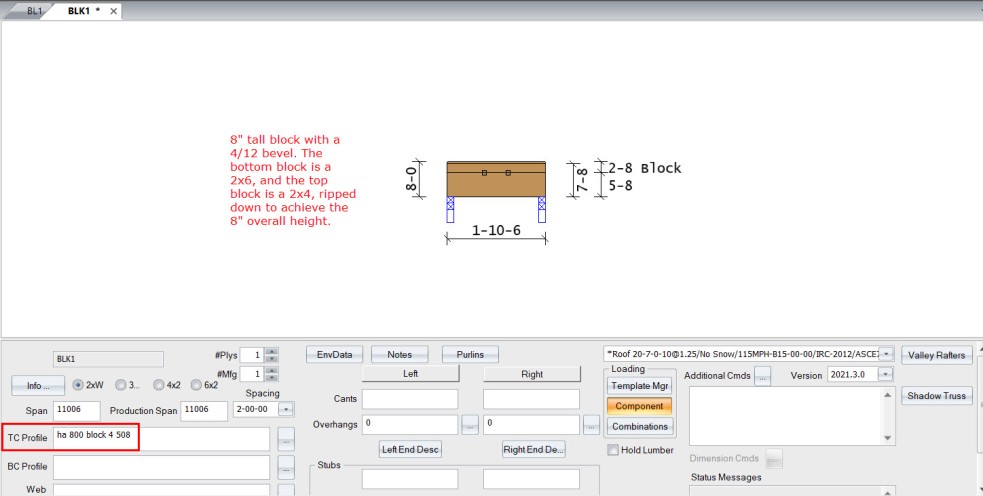
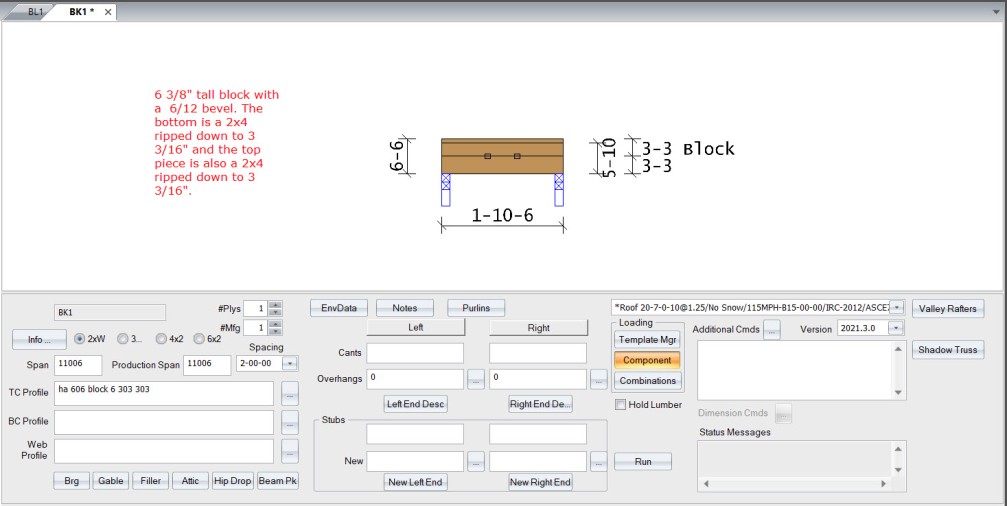
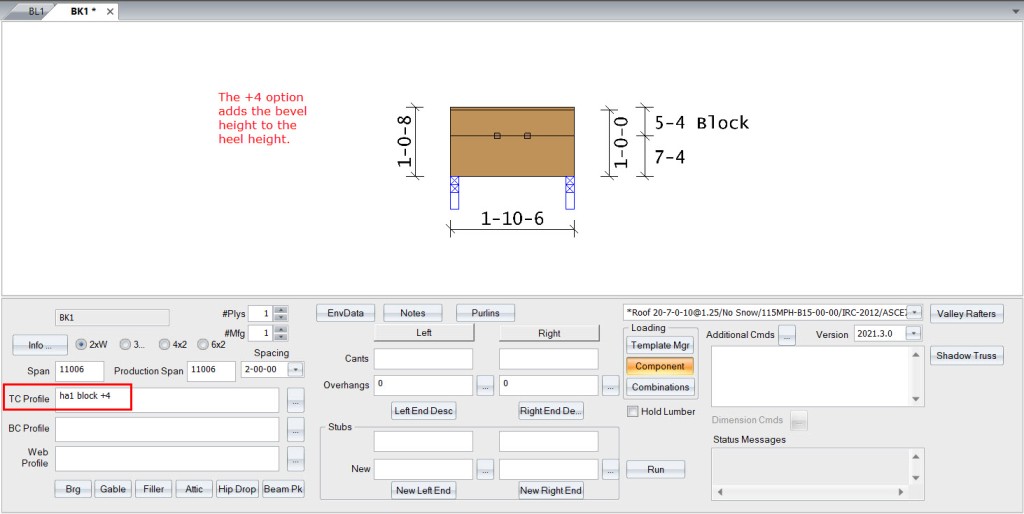
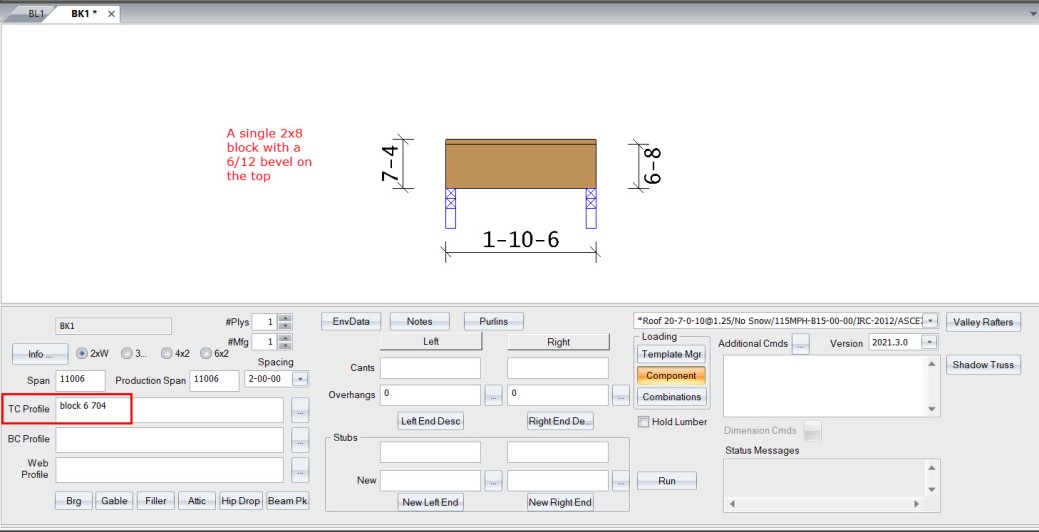
1. Use the block command to add blocks to a truss.
The format of this command is:
block [pitch of bevel or 0] [actual size of lower] [actual size of upper]


 Notes: SST component review requires tie plates for stacked blocks to cover across the centerline of both the upper and lower stacked boards. This may require adjustment of your plate handling file to increase the default plate size for the TC-Bearing, no Brg Block setting.
The minimum plate length for each plate size should be set so that it is long enough to cover to the centerline of both blocks. For example, a 2x8/2x8 stacked block requires a plate that is at least 7.25” long in order to guarantee that the centerline of each member is covered:
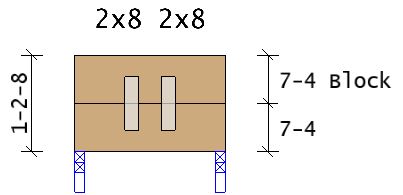
In the above example, the span is set to “less than 10 feet” length (L) row for 2x8 chord size to a length of 7.25. It is recommend to set the length equal to the size. Therefore, for 2x4" set it to 4", 2x6 set it to 6", 2x8 set it to 8", 2x10 set it to 10", and 2x12 set it to 12":

Side-supported Shear Panels
For very tall shear panels, you may want to connect the shear panels to end verticals, spreading the load along the entire length of the vertical. See Drag Loads.
Related Topics